The size of the images that can be printed/ captured from Google Maps is limited to the browser window’s dimensions. Therefore, sometimes you may come across situations where you need stitching Google Map images to make large high-resolution Google Maps. Such situations are maybe for printing purposes or any other offline uses.
In my previous post, “How to capture, print a large Google map – larger than the screen“, I explained how you could save large Google map images. However, the size of the images that can be captured using Google Map Customizer is limited to the hardware performance and the internet speed.
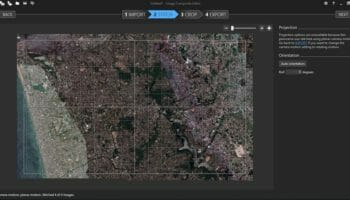
If the size of the image that can be captured with Google Map Customizer is not large enough, you can capture it as multiple images and stitch them later. But, stitching them manually is not so easy. In that case, you can use Microsoft Image Composite Editor (ICE) for stitching Google Map images.
Image Composite Editor (ICE)
Image Composite Editor (ICE) is an advanced panoramic image stitcher created by the Microsoft Research Computational Photography Group. Given a set of overlapping photographs of a scene shot from a single camera location, the app creates high-resolution panoramas that seamlessly combine original images.
The Image Composite Editor (ICE) no longer seems to have it available for download. However, you can download a previous version from the following archived links.
ICE-2.0.3-for-32-bit-Windows
ICE-2.0.3-for-64-bit-Windows
Stitching Google Map Images with Image Composite Editor (ICE)
As mentioned above, the ICE capable of combining a set of overlapping images into one large image. So, you can use this technique to create high-resolution Google Maps. What you need to have is a set of high-resolution images covering the entire area you required.
To stitch the images with ICE, you need to capture all the images with the same zooming level. And also, your images must have overlapping sections with the image you are intended to join. You can capture such images in high-resolution Google Map Customizer, as explained in this post.
You can see in the following video tutorial how easily you can join the Google Map images with ICE. In this example, I am stitching four 10000×6000 pixels images captured with Google Map Customizer.
To stitch Google Map Images
- Import the images to ICE
- After you uploaded the image, leave the default settings, and click “Next“.
- On the next screen, you can see that the ICE has correctly positioned your images. Now you are ready to stitch the Google Map Images. Leave the default settings and click “Next“.
- Now your images have joined and click “Auto Complete” to optimize your image. ICE will crop the images to get the maximum possible area.
- Click “Next“.
- On the next screen, you can adjust the quality settings.
- Then click Export to disk… to export your image.
Wrapping Up
Microsoft promotes the Image Composite Editor (ICE) as a tool for photography. However, you can use this tool to stitch any overlapping set of images to make one large image. Accordingly, in this tutorial, I showed you how you could use ICE for stitching Google Map images to create high-resolution Google Maps.


thank you very much this article helped me a lot
Great tutorial! You can also save the stitched image to a web page with a zoomable viewer by using a third-party template in ICE. Learn more at https://zoomable.ca/create_from_desktop.html
Perfect tool, applicable not only for Google Maps ?