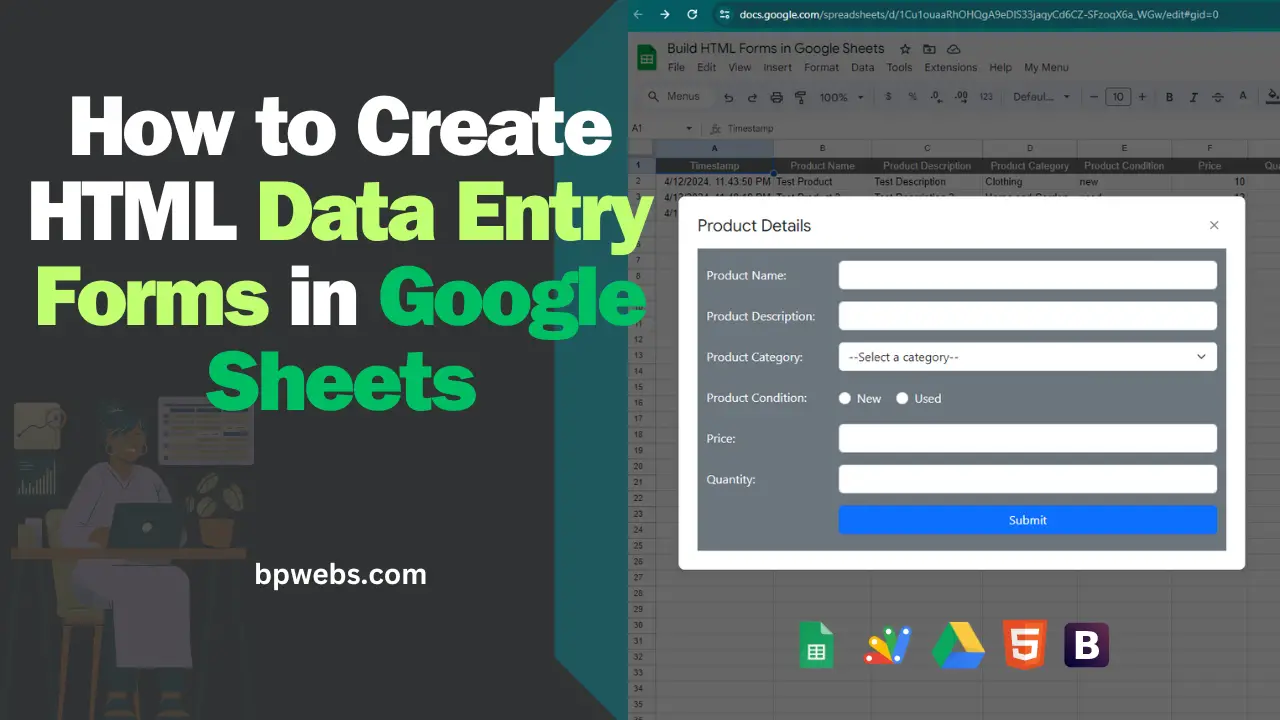
Are you constantly battling typos, inconsistent formatting, and the sheer tedium of manually entering data into spreadsheets? If so, it’s time to ditch the error-prone process and upgrade your workflow. The data entry forms are a great way to improve this workflow and increase the efficiency of the data entry process. With Google Apps Script you can build data entry forms in Google Sheets that help you reduce the errors in data entry works and improve the efficiency.
You can also build a data entry form using the spreadsheet cells. But those forms have very limited features compared to HTML forms built with Apps Script. However, if you’re still looking for a cell-based data entry form, you may want to read the blog post, “How to Create a Data Entry Form in Google Sheets“.
Table of Contents
Video Tutorial
Why Data Entry Forms? The Power of Structured Input
Are you ready to transform your data entry process? Here’s why forms offer a superior solution compared to directly typing into spreadsheet cells:
- Accuracy Matters: Forms provide a guided structure with built-in validation rules. This means fewer typos, incorrect data formats, and greater overall data quality.
- Efficiency is Key: No more scrolling or hunting for the right cell. Forms offer streamlined input, drop-down menus, and automation options to save you time and effort.
- User Experience Wins: Well-designed forms are intuitive for anyone to use. Clear instructions and immediate error checking minimize frustration and improve submission accuracy.
- Centralization for the Win: Forms direct all your data into a designated location. This keeps information organized and ready for further use.
By using a custom data entry form, you’ll ensure your Google Sheets stay clean, well-formatted, and effortlessly filled with reliable information!
Creating Custom Data Entry Forms in Google Sheets with Google Apps Script
Google Apps Script is a versatile tool that lets you automate tasks and extend the functionality of Google Workspace applications like Sheets, Docs, and Forms. With Apps Script, you can create custom HTML forms and display them as modal dialog boxes within Google Sheets. This offers a streamlined and user-friendly way to create data entry forms directly inside your spreadsheets.
A modal dialog box is a pop-up window that appears on top of the Google Sheets interface. It takes the focus away from the main spreadsheet until the user interacts with it.
Step 01. Make a copy of the Google Spreadsheet to your Drive from the Following Link
In this blog post, I won’t dive into every single line of code. Instead, I’ll focus on the specific sections you’ll need to customize to tailor the form to your needs. Much of the code can remain untouched, making this accessible to Google Sheets users even if you only have a little HTML experience
To get started, make a copy of the Google Sheets Data Entry Form template using the following link:
Link to Google Sheets with Apps Script
Step 02: Access the Data Entry Form and enter some data to verify functionality.
Open the copied Google Spreadsheet. Once the spreadsheet is fully loaded, you will see a custom menu named My Menu.
- Click My Menu, and select “Open Form“.
- When you do this for the first time, you will be prompted to grant permissions. To do so, please click on ‘OK’, select your email, click on ‘Advanced’, click on the link starts with “Go to …..“, and then click ‘Allow’ on the next screen.)
- Again go to My Menu > Open Form.
The above steps open the modal dialog box that contains our HTML form. You can test the form by submitting some data.
Step 03: Customize the form to fit your requirement
As I mentioned earlier, this form leverages the power of Google Apps Script. Additionally, it uses the Bootstrap CSS framework to provide a clean, modern look. You can access and edit the Apps Script code by going to Extensions > Apps Script.
Once you open the editor, you’ll see the following script files.
This Apps Script project contains the following five files,
- Code.gs
- Css.html
- Form.html
- Index.html
- JavaScript.html
The Code.gs file handles the server-side code, which is responsible for interacting with your Google Spreadsheet. The Index.html file provides the main structure of the form. While the form’s complete HTML code is within Index.html, it’s been organized into separate files and then included using the server-side Include function. This keeps the code clean and easier to manage.
The Form.html file contains the HTML code that structures your form. The Css.html file allows you to link external CSS files for styling the form, and additionally, you can include your own custom CSS styles within that file. The JavaScript.html file contains the client-side script that handles form submission and sends the collected data to the server for processing.
To make basic customizations like changing field names, and adding and removing form fields, you’ll need to modify the Code.gs and Form.html files.
Rename Text Input Fields
To rename a text field, you’ll need to modify the corresponding names in both Form.html and Code.gs files. Note that since this code doesn’t directly utilize the column headers in the Google Sheet, the names in the form and code don’t necessarily have to match the Google Sheet column header names.
For example, let’s say you need to change the first field (currently labeled “Product Name”).
- Change Form Control Attributes (ie. id, name, and for). Make sure to use the same name for the attributes highlighted in yellow. You can update the text highlighted in green to change the visible field name to the users.

- Find the corresponding field name in the
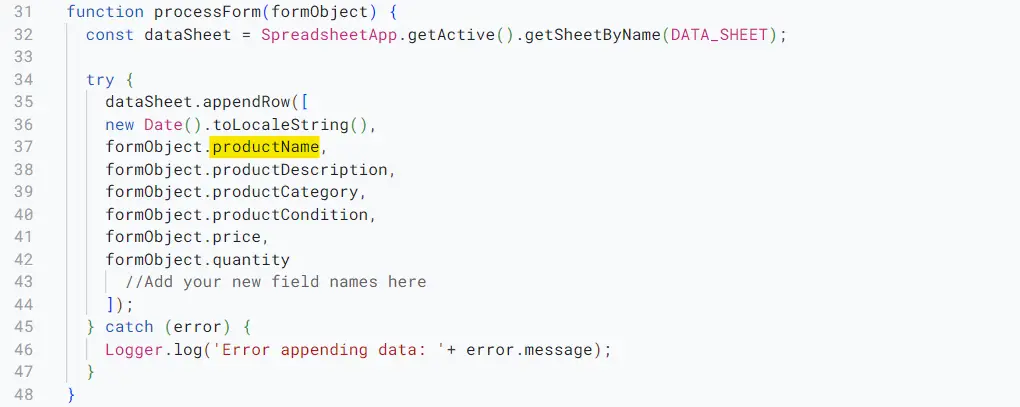
Code.gsfile (highlighted in yellow in the image). Make sure it exactly matches the ‘name’ attribute you set for the form field.

Change the Radio Button fields
The following HTML section creates the radio button field in the form. Several attributes need to be changed in order to change the radio button field.

- Use the exact same ‘name’ attribute for all yellow-highlighted fields. This ensures they function as a group.
- Each radio button needs a unique ‘id’ (highlighted in blue) attribute. This allows the browser to distinguish between them.
- The ‘value’ (highlighted in green) attribute determines what data is sent to Google Sheets when a specific radio button is selected. Make sure each ‘value’ is unique and meaningful for identifying the user’s choice.
To add more radio buttons, duplicate lines 44 to 47 in the image. Remember to update the ‘id’ and ‘value’ attributes for each new button to ensure they are unique.
Don’t forget to update the corresponding field name in the Code.gs file. Make sure it exactly matches the ‘name’ attribute you set for the form field.
Change the dropdown field/ add more items
In this example, the dropdown list items are hardcoded. However, with some additional JavaScript, you can easily populate the dropdown list dynamically from a range of values in your Google Sheet.

- You need to modify the form control attributes highlighted in yellow and the items in the dropdown list (inside the red border) to alter the dropdown list.
- Make sure to maintain the same name for each attribute highlighted in yellow.
- The section inside the red border lists the dropdown options. The ‘value’ attribute of each option determines the data sent to Google Sheets when selected, while the black text is what the user sees in the list.
- Add more items to the dropdown list by duplicating the HTML tag. Make sure to update the ‘value’ attribute and the text between the
tags for each new item.
Don’t forget to update the corresponding field name in the Code.gs file. Make sure it exactly matches the ‘name’ attribute you set for the form field.
Add more form fields and customize the form design
As mentioned earlier, this project uses the Bootstrap CSS framework. To add more form fields beyond those discussed above, refer to the Bootstrap 5 forms documentation here.
Show the forms in the Sidebar and Modeless Dialog Box
You can also show this form in the Sidebar and Modeless Dialog Box.
More about data entry forms in Google Sheets
With Google Apps Script, you can build several types of data entry forms to submit data to Google Sheets. This ranges from simple spreadsheets and cell-based data entry forms to custom web apps that can embedded on Google Sites or your websites. We have discussed various types of such data entry forms on our blog.
To perform the data entry works using the method we discussed in this blog post, you have to share the Google Sheets with the person you do the data entry work. But, if you do not want to share the datasheet, you can create a custom web app as explained in the following blog post.
How to Create a Data Entry Form with Google HTML Service and Submit Data to Google Sheets.
Wrapping Up
By building custom data entry forms in Google Sheets with Google Apps Script and HTML, you’ll unlock a whole new level of efficiency and accuracy. Say goodbye to tedious manual entry and embrace streamlined processes. With the power of customization, you can create forms that perfectly match your needs.
Ready to transform your data entry workflows? Experiment with the code, tailor the form to your specific use case and explore the possibilities offered by Bootstrap’s design elements. And don’t forget – there are even more ways to create data entry forms within the Google ecosystem; keep exploring other methods on our blog!


Very good tutorial Sir.
How if I want to do more using this modal dialog, I want to update, and save the changes this. Can we protect the sheet? Anyone with the sheet can fill out the form, they can only see the data, but can not make any change to the data sheet. Thank you.