Keeping track of your income and expenditures is an important part of your financial planning. It can help you to understand your spending habits, set financial goals, make informed financial decisions, and spot potential problems early on. There are many different ways to store your income and expenses. Some people use a paper budget, while others use a budgeting app or software as their personal finance tracker. There are plenty of financial tracking apps and templates available out there. But you will have several advantages in using Google Sheets as your income and expense tracker.
Table of Contents
The benefits of using Google Sheets to record finance data over other methods
While mobile apps have gained popularity for personal finance management, Google Sheets offers distinct advantages as a financial tracker.
- Accessibility: Google Sheets allows you to conveniently access and update your financial records anytime, anywhere, across various devices.
- Customization: With customizable features, you can create a tailored finance tracker in Google Sheets that encompasses income, expenses, and budgets.
- Insights: Google Sheets offers powerful formulas and data analysis capabilities, enabling you to gain valuable insights into your financial patterns.
- Custom Apps: Through Google Apps Script, you have the option to develop your own custom web apps that seamlessly record financial data directly into Google Sheets.
- Security: Google Sheets ensures the safety and privacy of your sensitive financial information with robust security measures, including two-factor authentication and data encryption.
Things to consider when recording personal income and expenditure
Accuracy: Ensure that you record all income and expenses accurately to reflect your financial reality. Be diligent in capturing every transaction, whether it’s a salary deposit, a bill payment, or a purchase.
Consistency: Maintain a consistent format and categorization system for your income and expenses. This helps in organizing and analyzing your financial data effectively.
Timeliness: Record income and expenses promptly to prevent any missed or forgotten transactions. Delayed recording can lead to inaccurate financial tracking and may hinder your ability to make informed decisions.
Detail: Include relevant details for each transaction, such as the date, source/purpose, amount, and any additional notes. This level of detail provides a comprehensive overview of your financial activities.
Categorization: Assign appropriate categories to each income and expense entry. Consistent categorization allows for easy tracking and analysis of spending patterns, helping you identify areas where you may need to make adjustments.
Method of Recording: Choose a recording method that suits your preferences and lifestyle. This could involve using a spreadsheet, a dedicated personal finance app, or even pen and paper. Find a method that is convenient and practical for you to maintain consistency.
Backup and Security: Regularly back up your financial records to prevent data loss. Consider utilizing cloud storage or digital platforms that offer data encryption and secure access. Protect your sensitive financial information by implementing strong passwords and enabling security features.
Periodic Review: Set aside time periodically to review your recorded income and expenses. This practice allows you to identify trends, track progress toward financial goals, and make adjustments to your spending habits if necessary.
How to Use Google Sheets for Tracking Your Financial Data
Tracking your income and expenses using Google Sheets can be done in various ways. One simple method is to create a table where you can input your financial data and visualize it using charts. However, you can also take advantage of Google Apps Script to enhance your tracking experience. With this powerful tool, you can create data entry forms and web apps that make it easy and accurate to input your financial information into Google Sheets. These forms can be accessed both within Google Sheets and through your web browser, including on your mobile phone.
In this blog, we have written several blog posts on creating several types of data entry forms and web apps with Google Sheets and Google Apps Script. You can use the same methods to create your personal finance tracker with several interesting options. I will combine the methods discussed in the following two posts to create the personal expense tracker.
- Creating Forms in Google Sheets – Sidebar & Modal Dialog forms
- How to Create Data Entry Form with Google HTML Service and Submit Data to Google Sheets
Free Customizable Google Sheet with sidebar form and web app for Recording your Income and Expenditure Data
If you are looking for a Google Sheets template for recording your budget or financial data, you can customize and use the Google Sheet link given below for free. However, it’s more than a simple template. It contains a sidebar form and also you can generate a web app to use on your mobile with a few clicks to add your data easily.
How to use this Google Sheets to record your income and expenses
You can use this Google Sheets directly to record your data without any knowledge of Google Apps Script and without doing any modification to the code. The following video briefly explains how you can customize and use this Google Sheet.
Step 01: Copy the Google Sheets to Your Drive
To get started, copy the Google Sheets to your Drive from the following link. This Google Sheet also includes the bound Google Apps Script that I am going to explain later in this post.
Link to Google Sheets with Apps Script
Step 02: Open the sidebar form
This Google Sheet contains five tabs (Sheets) namely, Data, Income, Expenditure, Dashboard, and Settings. The contents in the Income, Expenditure, and Dashboard tabs are included several functions to update the content as you add data to the Data tab.
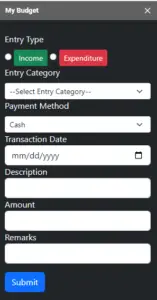
This Google Sheet contains a sidebar data entry form to add entries easily and accurately. To open it
- go to My Menu (a new menu item created by the Google Apps Script attached)
- Select the Sidebar Form option.
- When you open this for the first time it will request your authorization to run the script attached. Click Contine> Your email account > Advanced > Go to Budget Template link > Allow
- Again go to My Menu > Sidebar Form
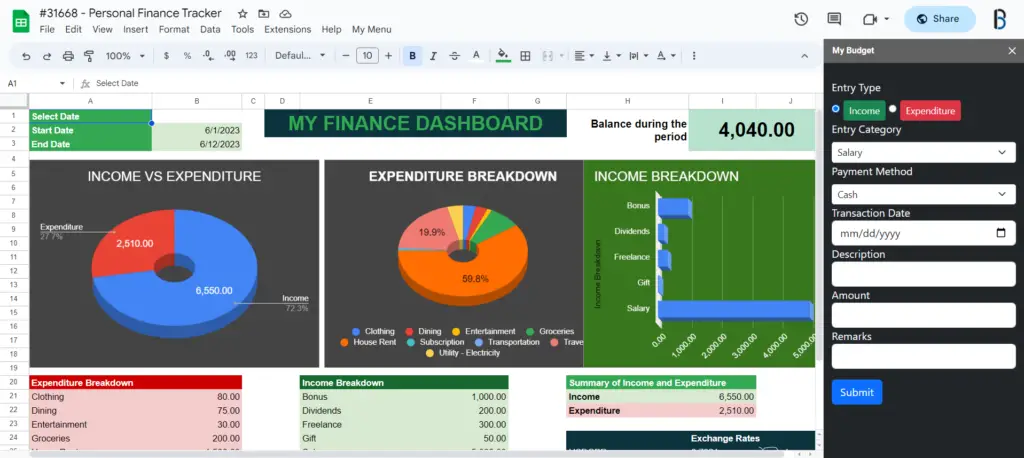
- Now your form will open up on the Right side of your Sheet.
Step 03: Customize the Dropdown list (Entry Category and Payment Method)
In this shared Sheet, I have included a few options for the Entry Category and Payment Method dropdowns. The list items for these dropdown lists are taken from the Setting tab. To customize the dropdowns,
- Go to Settings tab(Sheet)
- Columns A and B contain the list sites for the Entry Category Dropdown list. Update this list to match your requirements. In column A there are only two entry types, namely “Income” and “Expenditure”. You also must use only these two entry types for column A. You can add any category to column B.
- Column D contains the list items for the Payment Method dropdown list. You update and add items to this list as per your requirements.
- To apply the changes, regenerate the form by going to My Menu > Sidebar Form
Step 04: Add Entries
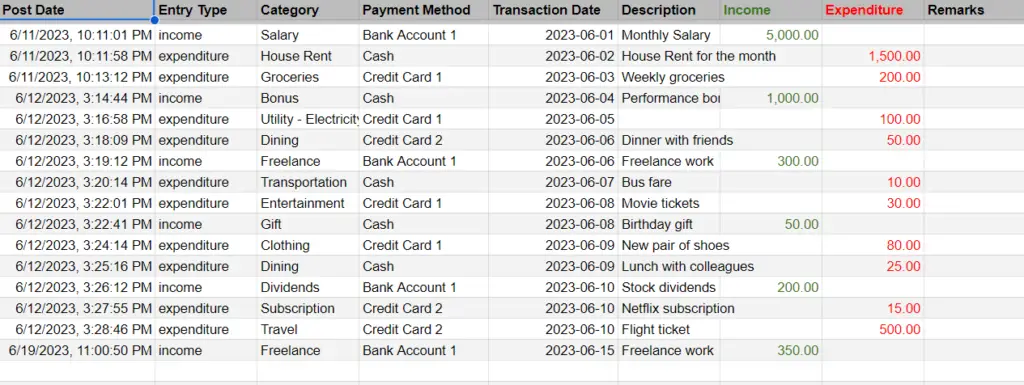
Now your form is ready to add entries. The entries you added are saved to the Data tab.
- When adding data, you must first select whether it is an income or expenditure entry using the “Entry Type” radio button. Once do that, the entry category dropdown is populated from the relevant list (income list or expenditure list).
- Now you can add the other details.
- Then click the submit button to save the record, and you will see your record is successfully appended to the table in the Data tab.
- I have also added a column to record the post date to track your data entry automatically.
Step 05: View the dashboard
This Google Sheets is include a basic dashboard to graphically view a summary of your data. You can start by selecting the data range for which you want to summarize. You can do it using the start and end date in the cells B2 and B3 respectively.
How to generate the Web App URL to use the data entry form in web browsers
The custom menu and sidebar forms mentioned above are not available on Google Sheets for mobile devices. Additionally, we cannot always access desktop devices whenever we need to use this form. To address this issue, I have included the necessary codes to generate a Web App in the Apps Script file of the attached Google Sheet. By deploying it as a Web App, you can conveniently enter your financial data into this Google Sheet using web browsers on any device. I have implemented a responsive layout to ensure seamless usage on mobile devices without any complications.
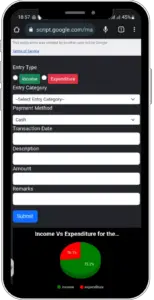
To deploy as a web app,
- Open the Script Editor by going to Extensions > Apps Script
- Click Deploy > New Deployment
- Click the gear icon and select the Web app option
- Select your email address for the “Execute as” field
- For the “Who has access” field select Only myself.
- Click Deploy
- In the next screen, you will get the URL for the web app.
To access the web app, you can use the URL generated in any web browser. However, please ensure that you are logged in to your Google Account with the email address you used to generate the web app URL.
How to customize the Sidebar Form and Web App according to your requirements
You can use the Google Sheets provided above as a template to keep track of your personal finances. If you have some basic knowledge of HTML and JavaScript, you can customize the web forms to add more fields.
Below is the Apps Script code for the Sidebar form and Web App. I will explain it briefly so you can understand how it is structured.
The above script contains the following files,
- Code.gs
- Sidebar.html
- JavaScript.html
- CSS.html
- Form.html
- WebApp.html
- ChartsJs.html
The Code.gs file contains the server-side functions. These functions are used to interact with the Google Sheets, provide data in Google Sheets to the front-end element such as dropdowns and charts, and process the data from the form.
The JavaScript.html file contains the JavaScript code required to make the form work. This code is used to generate dropdown lists in the form and submit the form data to the server.
The CSS.html file contains the CSS for the form. This CSS is used to style the form elements and to make the form look good. Here I use the Bootstrap framework to style the form and the web app.
The Form.html file contains the HTML code for the form. When adding a new form element, you must include the corresponding HTML code in this file. However, it’s important to note that in order for the new form element to function properly, you will also need to make corresponding edits in the Code.gs and JavaScript.html files.
The Sidebar.html is called when you click the Sidebar option in the custom menu mentioned previously in the post. This file includes the Form.html, JavaScript.html, and CSS.html files using the include() function in the Code.gs file. By separating and including these code sections, we enhance the code’s readability and make it easier to work with each component independently.
The ChartsJs.html files contain the JavaScript code for generating the charts for the web app. I use the Google Charts JavaScript library to create interactive charts on our web app. This file includes the function to communicate with the server (Code.gs file) and to display the data in charts. You can learn more about displaying charts on web apps from our previous blog post, Visualize Google Sheets Data in HTML Charts.
The WebApp.html file is used to generate the Web App. it includes both the data entry form and charts. So, it includes the ChartJs.html file also in addition to what we have included in the Sidebar.html file. You can learn more about creating web apps with Google Sheets and Google Apps Script from our blog posts on “Web Apps“.
This is a very brief explanation of the code. You can also refer to the comments included in the code to find out what each function is up to.
If you have any additional features or improvements that you would like to suggest for this form, please feel free to mention them in the comment section below. I will be happy to consider and accommodate them in a future update of the code.
Wrapping Up
This blog post provides you with a Google Sheets template for recording your personal finance (income and expenses). In the beginning, I discussed the advantages of using Google Sheets as a method to track your personal finance, comparing it to other options like mobile apps. I also highlighted the key factors to consider when creating a finance tracker.
Next, I shared the link to the Google Sheets template discussed in this post. With just a few customizations, you can start using it to record your finance data. I explained how you can open the data entry form in the sidebar directly within Google Sheets. Additionally, I demonstrated how to generate a link to the web app, enabling you to use the data entry form on web browsers, including mobile devices.
Toward the end of the post, I provided a brief explanation of how to customize the attached Google Apps Script to tailor the data entry form according to your specific requirements.



Excellent Project, very potent for personal use, however Google is blocking this app for deployment as it tries to access some sensitive information !!! What I have understood is that Google doesn’t allow by default to sign in and access the app. How do we go around this problem ??
Nice project, it is exceptionally beautiful. I must say your projects are truly amazing. This particular project would have been even more impressive if it had the feature of attaching bills and the option to capture the email ID of the person making the entry.
Thank you so much for your kind words! I’m really glad you enjoyed my project.
I’ll definitely keep those in mind for future revisions.